
Step 1: Go to the Community page
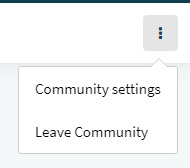
Once you're on the main Community page, click on the three dots icon in the top right corner. From the drop-down menu, select 'Community settings'.
Step 2: Validations and approvals
On the Community settings page, scroll down to the section 'Validations and approvals'. A white sliding marker means the automatic function is disabled; a green one means it's enabled.


What does this mean?
Enabling the first marker means that any new Order will automatically be validated. Some companies might want to disable this function to manually go over each Order separately.
Enabling the second marker has to do with getting email approvals each time someone wants to deliver goods. If enabled, you no longer need to approve Shipments manually if it fits into the agreed upon time window. Only when someone attempts to plan a delivery outside of it, or does not respect the other rules, will you receive a notification with a request to approve or reject it. If this function is disabled, you will need to approve or reject each delivery separately and manually.
Comments
0 comments
Please sign in to leave a comment.